Dakota Rustic features 1x6 rustic boards available in 4’, 6’, 8’ & 10’ lengths utilizing pine from the beautiful Black Hills in South Dakota.
Please use the table to calculate the number of linear feet per square foot
| Width | Net Width | Linear Feet |
|---|---|---|
| 1x6 | Net Face 5.5 | 2.2 lf / ft2 |
Installation
Interior product only; sealer is recommended.
Figuring # of bundles needed
Using a measuring tape, measure the height and width in inches of the area you want to cover. Multiply the height and width together then divide that number by 144 to get your square feet to be covered. Multiply the total by 1.10 to account for the waste from cutting boards to size. Take the total square feet and divide by square footage on the package to get number of packages you will need for your project.
Prepare the Surface
The surface must be clean, dry, flat and structurally sound. You may want to cover the wall with a dark color to prevent seams from sticking out. Outlets should not be covered up.
Choose a Pattern You Like
The most common patterns include: Diagonal, herringbone, and staggered horizontally or vertically.
Locate Supporting Studs
For best results, a combination of high quality industrial adhesive and finish nails is recommended. Use a stud finder to locate supporting studs and mark location of studs.
Create a Starting Line
No matter which pattern you install, a starting line must be determined. For horizontal wall board installations, start at the top or bottom of the installation. For vertical installations, draw the starting line at the left or right edge of the installation. For herringbone or diagonal installation, start in any corner. Use a level to insure a proper finished look.
Start the pattern
First apply construction adhesive to the back of a board. Place the board on the installation side of your starting line, press firmly, then nail into place. Make sure the nails go into studs to allow for proper support. Double check the angle of the board for accuracy as it will affect the appearance of the finished project.
Build the Wall
Keep adding boards along the starting line until the desired coverage has been completed. Use a miter saw to cut the last board so it matches the edge of the installation. As more rows of boards are added, vary the color pattern and make sure to alternate the board ends so they do not align directly from one board row to the next. Also, check each row with a level as you build it to insure they are all parallel to each other throughout the installation.
Outlets
To accommodate electrical outlets, make a template that is the size of the outlet box. Measure the distance from the end of the last closest board to the outlet. Place the template on the board that will cover the outlet so that the template is at the correct distance from the end and mark the template on the board. Use a jigsaw to cut out the marked area of the board.
Trim
The wall may be finished in several ways, including using trim or a cutdown portion of an extra board.
Finishing Ripped and Cut Edges
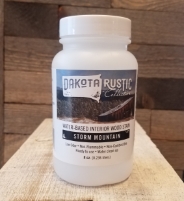
- 8oz touch up available in Storm Mountain, Sylvan Lake, Roughlock, Saddle Bronc, Pactola, and Canyon Lake.
- After cutting or ripping your piece of rustic wood, we suggest taking a hand held propane torch and burning that edge. Once you put a good burn on that unfinished edge then take a piece of sanding paper or sanding block and sand that edge to fade in the burn. This will help you maintain that finished look and still keep the rustic appearance. When burning the edge please be aware of your surroundings and make sure to keep the fire only on that edge and not on the finished faces of the board. If you do get some burn on the finished face then take a piece of sand paper and lightly sand that burn or fade it in to the finished face.
Finishing Corners
We suggest going to your local retail lumber yard and getting outside corner mouldings in pine for outside corners and a quarter round mouldings in pine for inside corners. To give it a rustic appearance you can take your propane torch and burn the product until it turns black, and this should not take very long. Once you burn it take your sanding paper or sanding block and sand over the burn which will turn it to a brownish color. It will be ready for install once sanding is complete.